I know summer is over but, we all have those summer photos lying around and you are not sure how to or what to edit them with....
So I
thought this would be the perfect time to share some tips on how to give
your photos a dreamy, summertime-inspired look using some of the
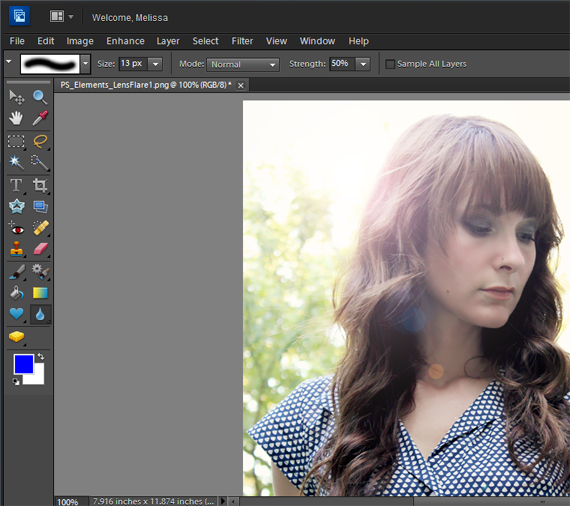
features available in Photoshop Elements . The main editing technique I'll be using for this is the lens flare filter,
but I'm also going to show you guys a couple of extra steps that I like
to incorporate to create an ethereal, summery aesthetic.
In photography, a lens flare is achieved when rays of (usually
bright) sunlight hit your lens and create effects that can include
sunbursts, circles of light, haziness and warm-toned glows. A lot of
times this happens unintentionally with back lit photos, but it can also
be done intentionally by placing your subject in front of your camera
with the sun behind them.
It can be a challenge to get this just right, but thankfully, the same
effect can be accomplished in just a few easy steps with Photoshop
Elements tools. Want to create this look on a photo that isn't back
lit? No problem. You can still use these tools to give your image an
airy, summer sun-kissed appearance. To demonstrate this, I'll take you
through the steps using a photo that is naturally back-lit.{you can do the same for a photograph that is not back-lit, just adjust where the "light" or flare comes from.}
When you're going through this tutorial, keep in mind that there are no
right or wrong adjustments, levels or tweeks. We're going for a warm,
sun-drenched, slightly washed-out look with this image. We're not
following any "rules" for a technically perfect photograph. Just have fun, experiment, and allow your creativity to flow freely!
{I found this demonstration "photo walk thru" online, but at the end you'll see my before and after}
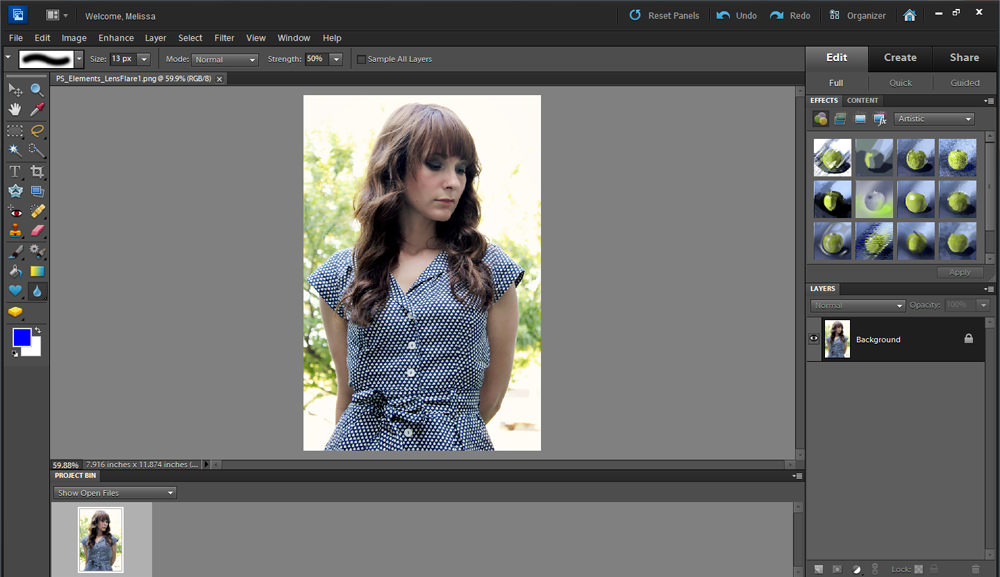
Open your photo file in PS Elements 10 (File > Open).
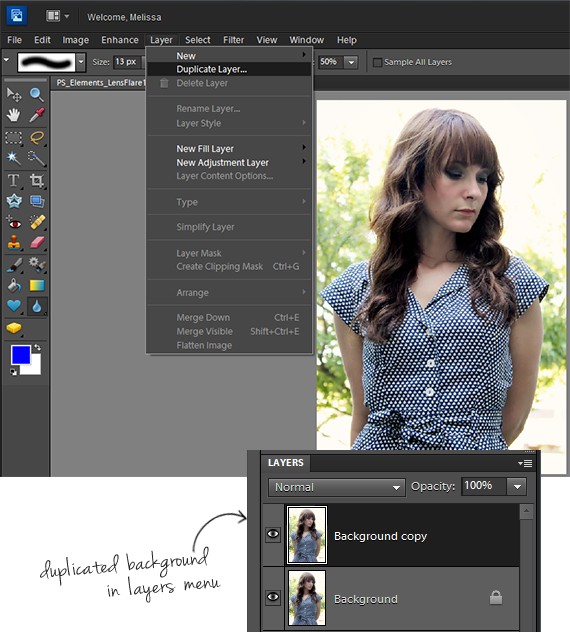
2. Duplicate your background layer (Layer > Duplicate layer).
This step is optional, but I like to do it so that I can compare the
edits to the original image, or even revert back to it if I'm not happy
with the edited image. (This can also be done using Layer Masks, but
we'll save that for another tutorial).
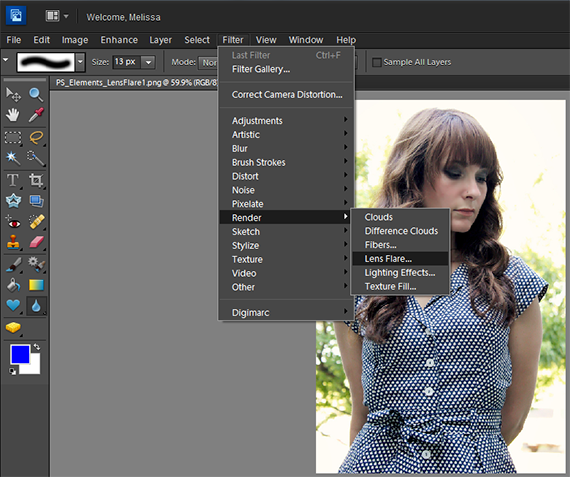
3. Create your Lens Flare by going to Filter > Render > Lens Flare.
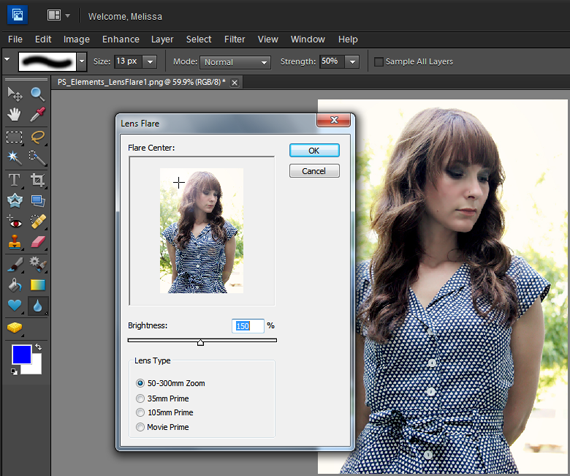
4. Tweek your flare in the dialog box. A
dialog box will pop up with options where you can choose Lens Type,
Brightness, and location and size of the flare. Place your cursor over
the cross to adjust sizing and move the flare to the desired place on
your image. One you've made your adjustments, click OK. As you can see,
for this image, I chose the 50-300mm Zoom Lens, increased brightness to
150%, and positioned the flare to the top left.
5. Review your image.
I'm happy with the flare effect on my photo (zoomed in on this shot by
going to View > Actual Pixels), but I'm thinking it could use some
more tweeking to make it a little warmer and more radiant.
6.
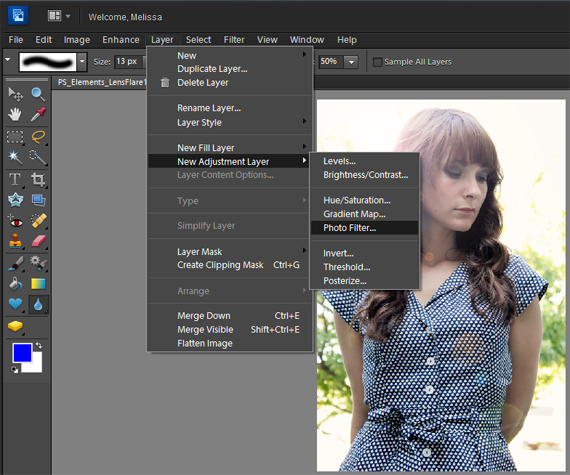
Create a Photo Filter adjustment layer by going to Layer > New
Adjustment Later > Photo Filter. Click OK in the dialog box. (An
adjustment layer allows you to add an effect to a layer that you can
edit at any time while still preserving your original layers.)
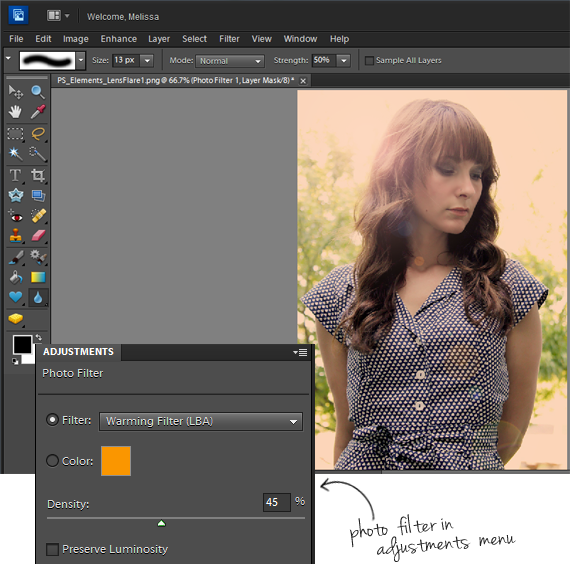
7. Choose a Warming Filter from the Adjustments menu (this
will be in the lower right corner of your screen), and use the slider to
select Density. I chose Warming Filter (LBA) at 45%. I also
unchecked the "Preserve Luminosity" box. This allows the color overlay
to cover all areas of the image, without it affecting the shadows or
midtones. If the back lighting in your photo is very bright like it is
in mine, this can give the image more of a washed-out, vintage effect.
If the lighting is more balanced in your photo, you may decide to keep
this box checked. Try it both ways and see which way looks best for
your photograph.
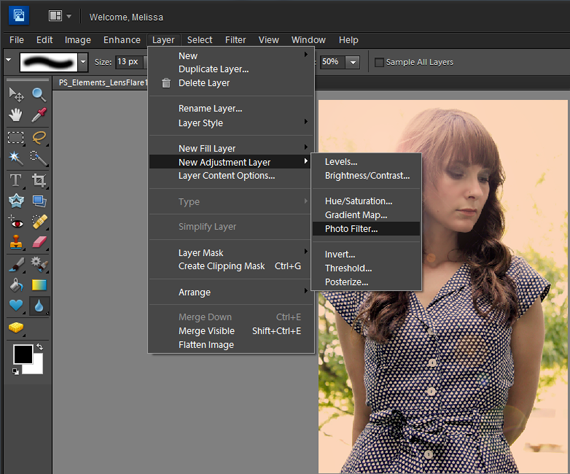
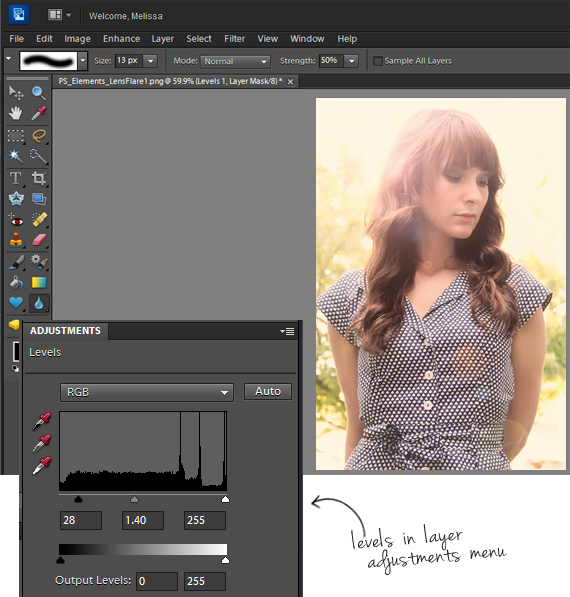
8. Now create a Levels adjustment layer by going to Layer > New Adjustment Later > Levels > OK. Unchecking the "Preserve Luminosity" box in step 7 darkened this photo quite a bit, so she wanted to brighten it back up.
9. Adjust the Levels in the Adjustment Layers menu to adjust the exposure, contrast, etc. Use the sliders to play with levels on your photo until the desired effect is achieved.
Before:
After:
I hope you will use this for all you fun sun kissed photos!